
DIY Girl’s Cynthia Rowley Sweater Dress
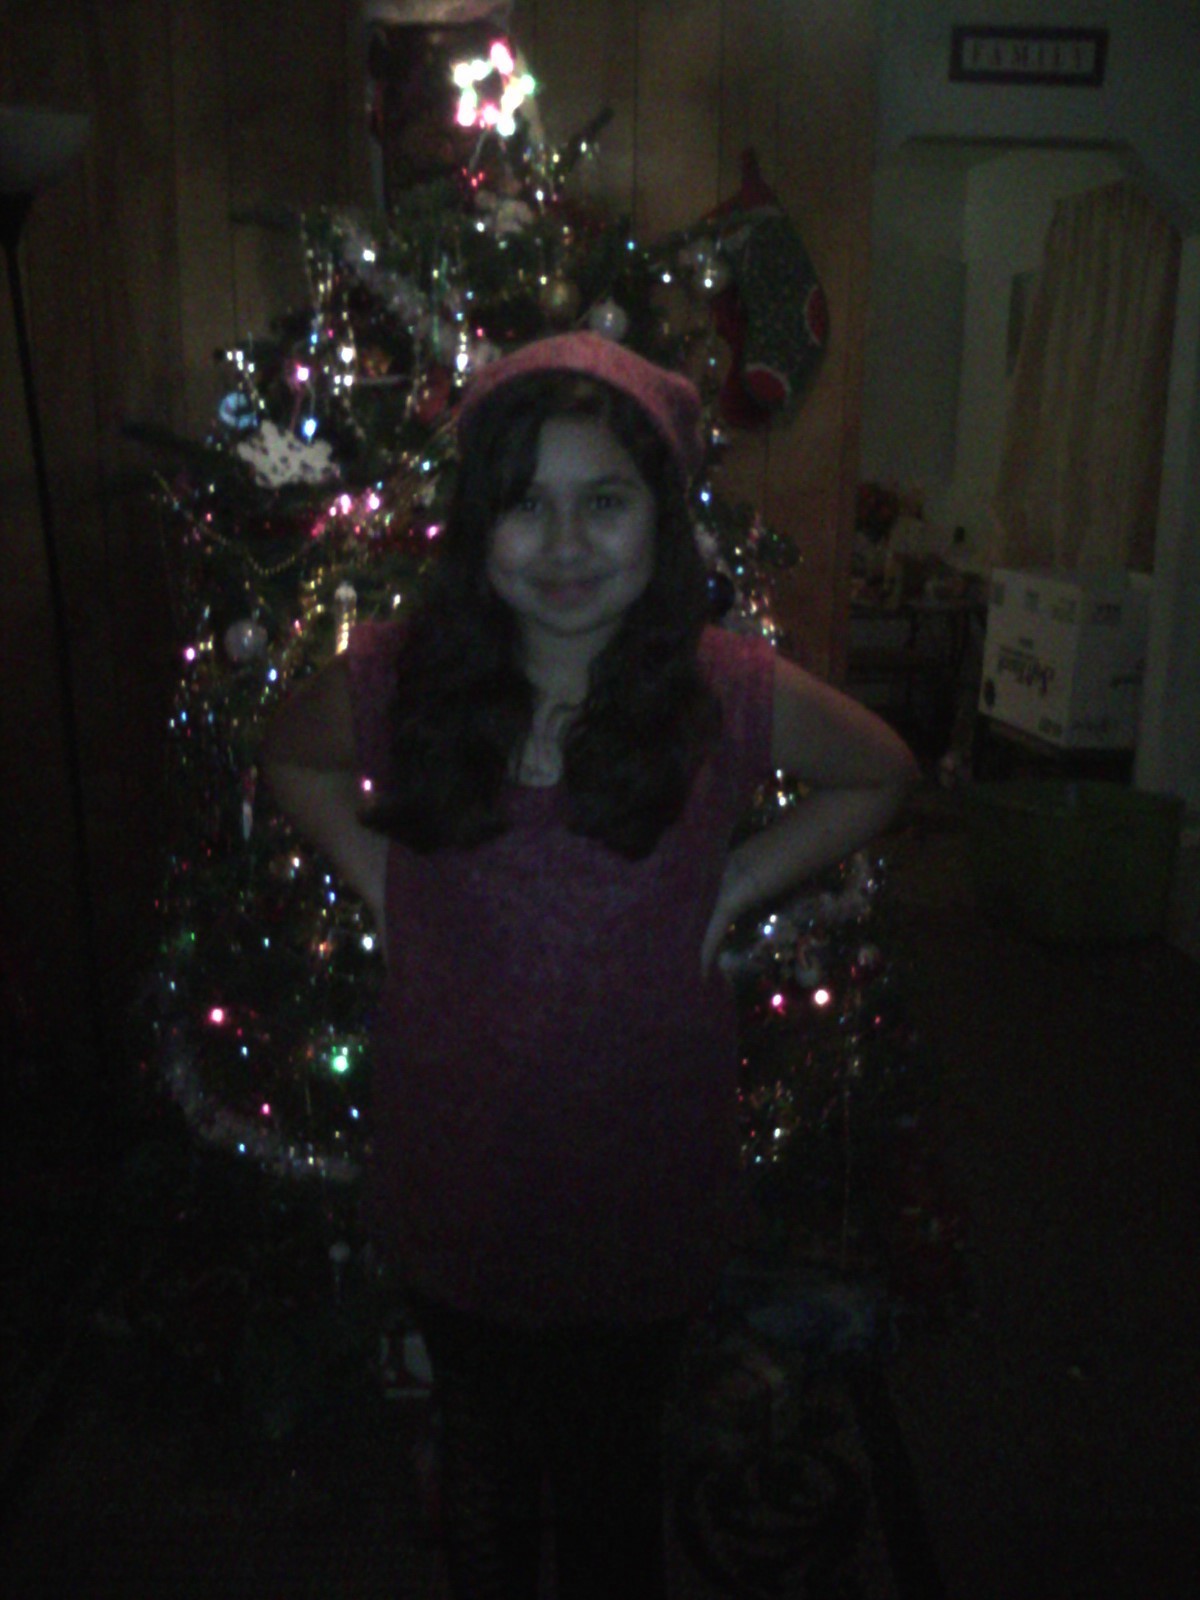
My latest project was supposed to be a Cynthia Rowley sweater dress for a Christmas present to my daughter. I ended up giving it to her early. Anyway, as you can see from my pictures the end product looks nothing like S2586. There is NOT a problem with the pattern, it’s my doing. I made several changes to the dress. So much so, that the dress is no longer anything like the pattern. That said, here’s the story behind the product. My daughter has been asking for a sweater dress. Knowing my child, I knew I had to get something trendy. She is often identified as “fashion diva” by her peers and teachers. I found Cynthia Rowley’s patterns to be up the alley of what my daughter would want as far as style, and fit.

I picked a lovely dark red with a black vertical knit going through it. It’s a wool blend sweater knit 80% wool, 15% polyester that has a soft cashmere feel. I shop for fabric online a lot because i find the best deals that way. the fabric i purchased was bought at Has a soft touch, lovely drape, and is just smashing. I was definitely pleased with this fabric.the pattern is Cynthia Rowley S2586, and can be purchased online or at your local pattern/fabric store.
I began cutting it out, as you can see in the photo’s, and then realized I had enough fabric left over to make a matching cap for DD, and an extra for my mother.
So 1 yard of fabric, 62” width got me a sweater dress, and two caps.
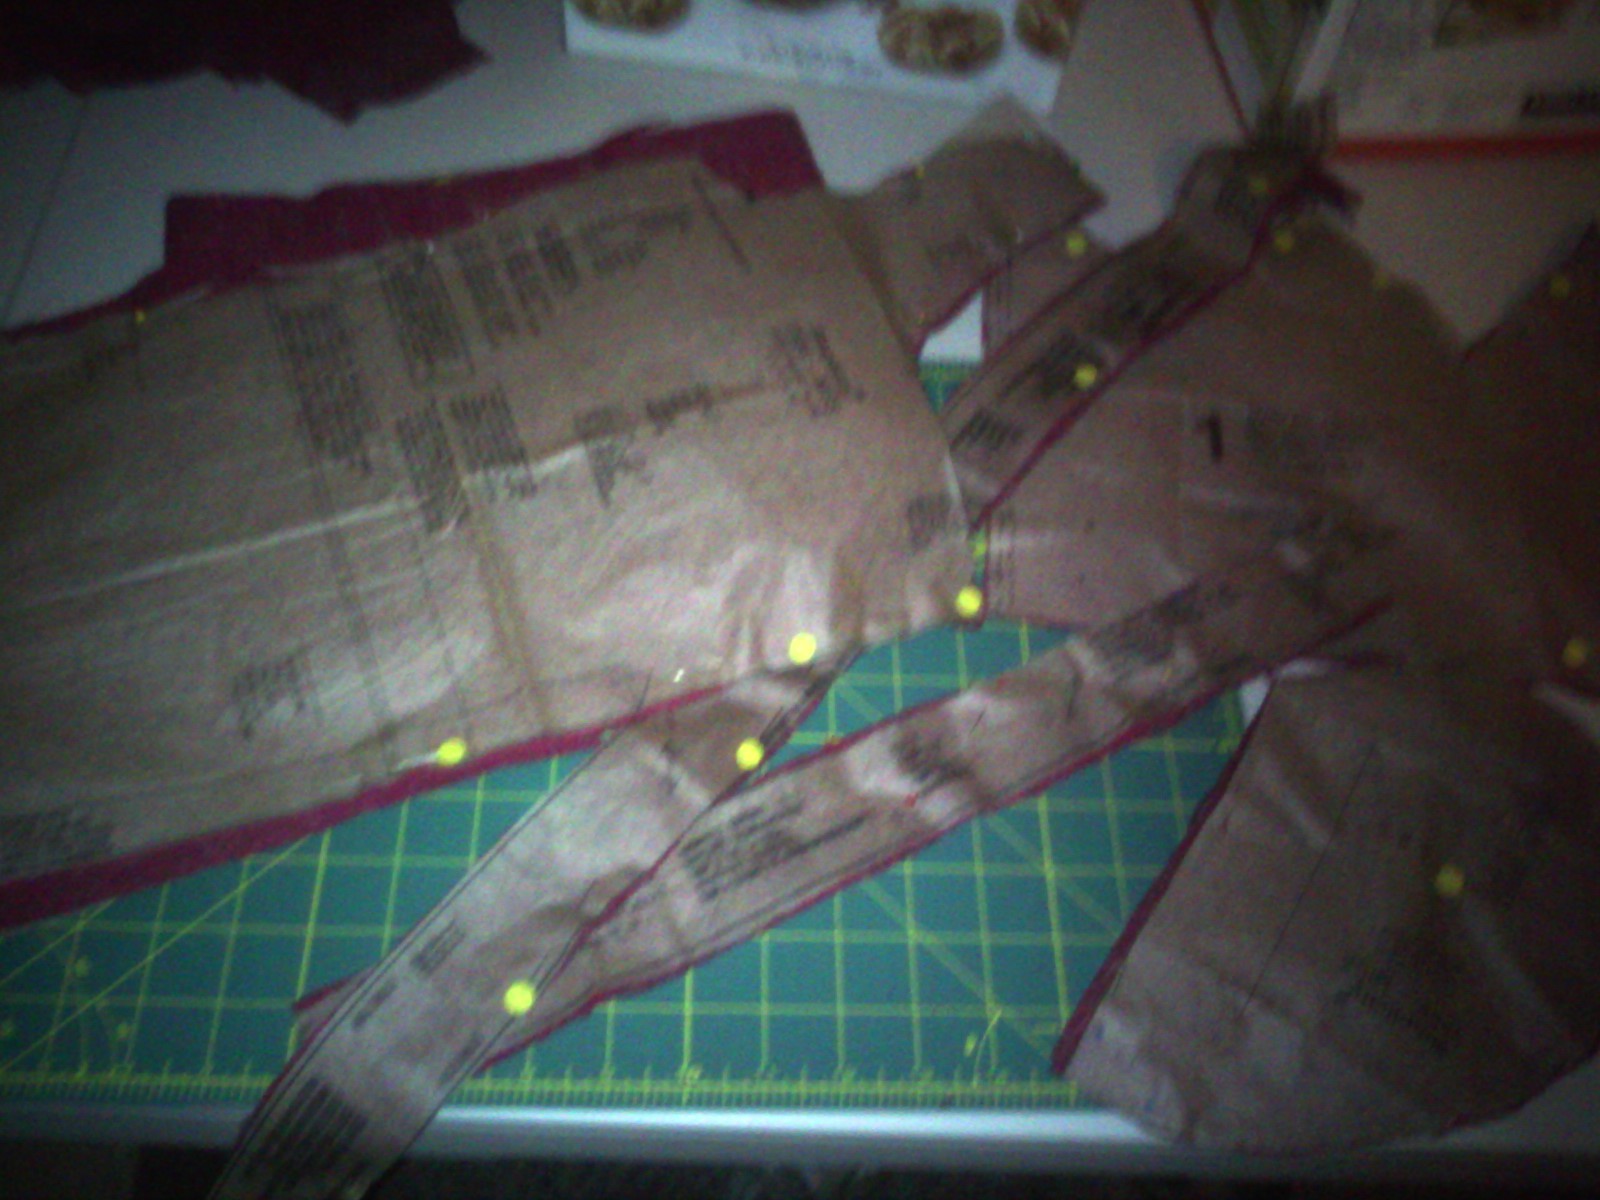
The dress was initially going to be view B. I pinned it, and then realized it would be too long. She wanted to wear it with jeggings . So I cut it shorter, comparable to view D, but a tad longer. I left out the pleats on the neckline. I also had to shave two sizes off of the width of this dress to accommodate my daughters frame. The pattern is size 6, and she wears about a 0 or 1. I figured shaving down 5 sizes would be over kill, so I shaved off about 2-3 sizes. Seemed to work out perfectly; I sewed her up, and began working on the neckline.

I had a feeling the armcyces would be too small, so I inserted a makeshift “gusset” under the arm. In the end, I had to take the gusset out because it made them too large. It was a pain in the neck ripping stitches from this fabric. I will say that in the future I will definitely use a thread slightly darker than the fabric for easy stitch identification. The thread I chose was a near perfect match to the fabrics main color. It was near impossible to see the stitches.

The above picture is what the neckline looked BEFORE alteration. I squared the neckline, and ended up having to take a bit more neckline in once she tried the dress on. I could have altered it more, but she wanted the neckline to be a little low so she could add tops underneath.

You can barely see it, but if you look closely you will see the alteration done to the neckline at the corner. I took the neckline, and cut into it at the end. I then attached it to the underside of the shoulder. This gave it a squared looked, and created very short “cap” sleeves.

A very happy elf indeed 🙂

The cap I made for my mother from See&Sew B4584.
Of course I docotred it a little bit to make it “adult-like”
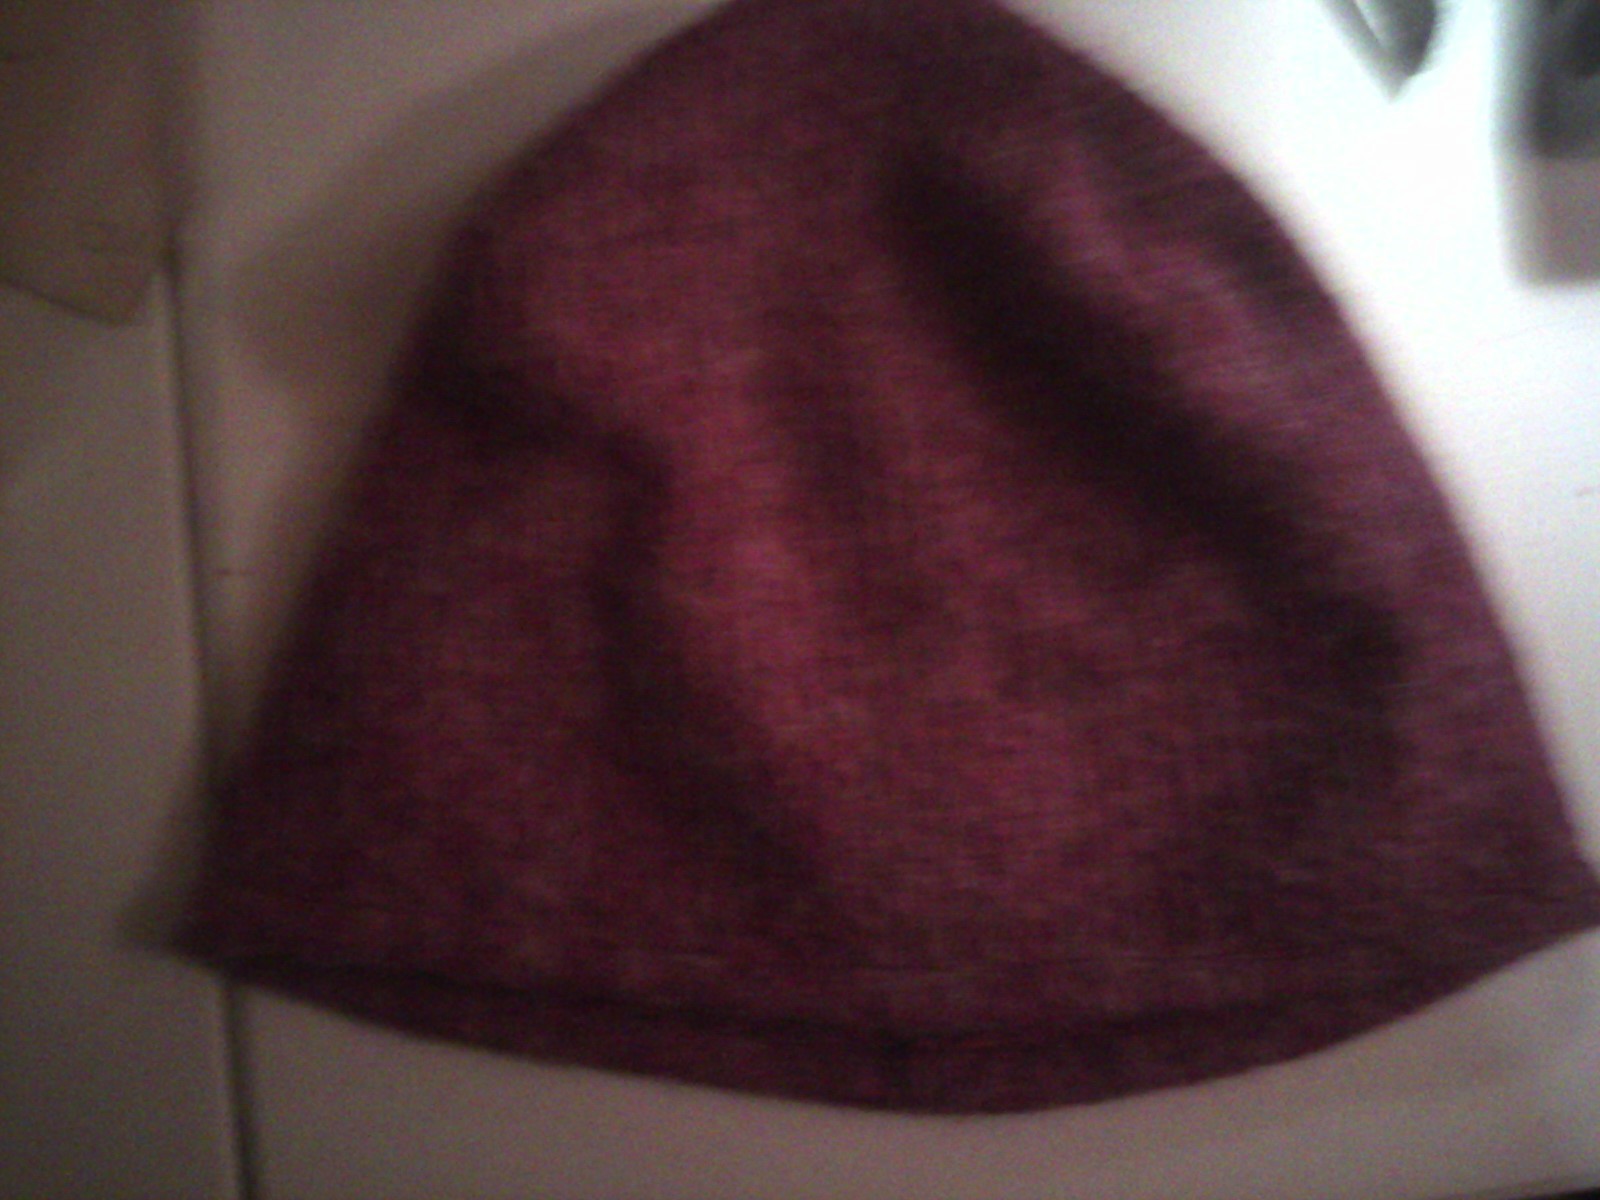
The cap I made from scratch (literally from leftover scraps). My own pattern was used.

My inspiration was obviously French:)

In the end, I realized I don’t always have to use a pattern. I couldn’t find quite what I wanted so I just adapted the current pattern I had on hand to my needs. The end result was a very happy 11 year old, and a very happy mommy…
This is an old post taken from my other blog that I am merging to this one. my daughter was about 10 or 11 years old, and she is now 16 years old. So yeah, it has been a few years 🙂


You May Also Like

Easy Christmas Card Tutorial & Free Graphic Stock Trial

New Cricut Explore Air Released
